The easiest and best way to order a custom dress shirt is to measure a shirt that already fits you well. Most reputable online custom dress shirt makers will provide instructions on how you can measure a shirt that fits you well as opposed to standard ‘off the rack’ sizing or traditional body measurements.
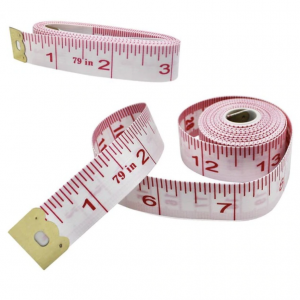
Before you begin, make sure you have a measuring tape, like the one shown below. Measure your existing shirt per the instructions shown. Do not add any tolerance. These are finished or ‘cut’ measurements. The measurements provided should be the exact same as the shirt in which it is being measured from. This ensures that you’ll receive a shirt that is a very close clone of the original.

Soft cloth tape measure
Step 1 — How to Measure Sleeve Length
There are two methods that shirt makers use for measuring sleeve length:
Method 1 — The Traditional ‘Off the Rack’ Measurement
This method is simpler and what you’re accustomed to seeing on most off the rack shirts. The disadvantage to the simplicity is that the back (yoke) and sleeve length are combined which can result in some inaccuracies depending on your arm length or back size.
INSTRUCTION: Lay the sleeve flat on it’s front and measure from the middle of the back (just beneath the collar) to the end of the cuff. If this is for a short sleeve shirt, please measure as described. Our tailors will determine the correct length if a short sleeve option is selected.

Measuring sleeve length from the center of the back
Method 2 — Measured from the Shoulder to the Wrist
This method tends to be more accurate as the sleeve measurement is decoupled / separate from the yoke (back) measurement.
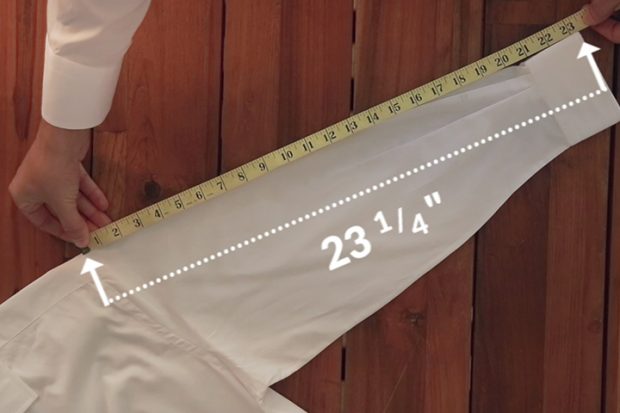
INSTRUCTION: Lay the sleeve flat and measure from the top of the shoulder to the end of the cuff. If this is for a short sleeve shirt, measure to the desired length — just beneath where the bicep lies is typically preferable.

Measuring sleeve length from the shoulder
Step 2 — How to Measure the Collar
INSTRUCTION: Lay the shirt flat on it’s back, remove any wrinkles, and measure from the center of the collar button to the furthest edge of the buttonhole.
NOTE: If you are inputting a standard collar size from an existing shirt, measure as shown above. Collar sizes on off the rack shirts are commonly upto 0.5″ larger than the listed size.

How to Measure Your Collar

Measure to the edge of the buttonhole
Step 3 — How to Measure the Chest
INSTRUCTION: Lay the shirt completely flat, and measure from edge to edge. Ensure that the shirt is fully stretched and that the seams are visible.

Shirt Chest Measurement
Step 4 — How (and Where) to Measure the Waist
INSTRUCTION: At the skinniest part of the torso — typically the fifth button, lay the shirt flat and measure across the surface of the shirt. This is where to measure the waist.

How to Measure the Waist
Step 5 — How (and Where) to Measure the Hips (Hem)
INSTRUCTION: Lay the shirt flat (buttoned) and measure from one of the bottom seams to the other.

How to Measure the Hem / Hip
Step 6 — How to Measure the Shoulders
INSTRUCTION: Lay the shirt flat (buttoned) on it’s front and measure from one edge of the shoulder to the other.
NOTE: This measurement is not necessary if you’re using standard / off the rack sleeve measurements (e.g. 30 — 37″) as the sleeve and back measurements are combined.

How to measure the back
Step 7 — How to Measure the Sleeve Width
INSTRUCTIONS: Lay the sleeve flat and measure from the top of the shoulder to the underarm.

How to Measure the Sleeve Width
Step 8 — How to Measure the Cuff
INSTRUCTIONS: Place the cuff on a flat surface. Place the measuring tape on the outer edge of the button hole and measure across to the center of the button.

How to Measure the Cuff
Step 9 — How to Measure Shirt Length
INSTRUCTIONS: Lay the shirt flat (buttoned) on its front and measure from the the bottom of the collar band to the bottom of the shirt.

How to Measure Shirt Length
Check out some of our other Popular Guides…
The Men’s White Dress Shirt — A Definitive Buying Guide on our Favorites
Necktie Knots — A Definitive Guide to Wearing the Proper Knot
Untucked vs. Tucked In — A Guide to Dress Shirt Length

